

Easy Ways to Take Screenshot on Laptop or PC
Content writers often use screenshot on laptops or PCs. Especially the content that is closely related to the tutorial. Not just writers. Students who want to share something, but on a laptop. Tend to choose screenshots to help the delivery process, so it’s easy to understand.
However, even though the screenshot feature has been provided on a laptop or PC. Some people don’t know about this feature. Finally, they use their smartphones to take pictures from their laptop screens. It doesn’t matter to me if the results are like the one below. This is much more artistic than screenshots.
So in this article, I will discuss how to screenshot on your laptop or PC, respectively. Hopefully, this can be useful for all of us. To make it easier to understand, I will make a few points that are marked in bold (bold).
How to take a screenshot on a PC
This first point will refer to PC users ( Personal Computer ), where we all know that the average PC is shaped like that. Imagine for yourself. Then, shape the keyboard as below.
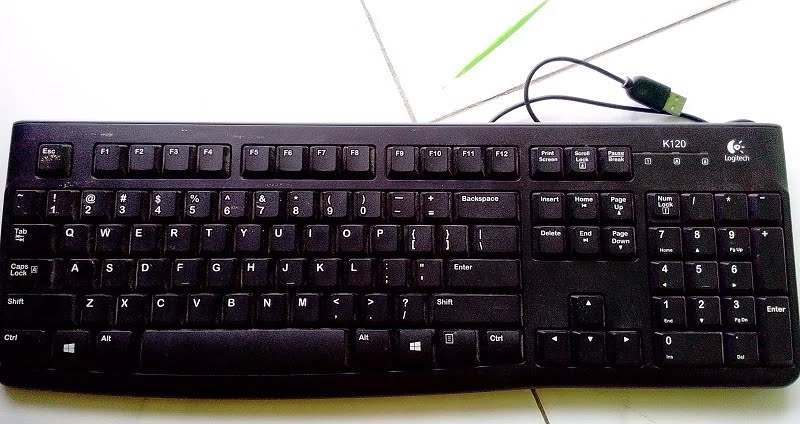
Why do I bother taking pictures of the keyboard? Surely I have a reason. First of all, I want to tell you that screenshots on a PC can be done via the keyboard above. Beforehand, let’s first equate perception. We assume that the PC, by default, uses a keyboard like that.
First, the keyboard above is connected to a PC. This step must be done in order to proceed to the next step.
Second, press the ‘Print Screen’ button. Look at the image below. However, some keyboards don’t have the screenshot key shown below. It usually says ‘PRTSC.’ It’s the same. Just shortened it.

Third, open the Paint application. Usually, the windows already exist. It doesn’t have to be Paint. We can also use office applications or other applications that support CTRL + V (Paste).

Fourth, as I already mentioned. Press CTRL + V on your keyboard earlier. Right after your Paint is open. So that the image we screenshot earlier will appear in Paint. Incidentally, what I screenshot is my PC desktop so that the desktop image appears on the Paint worksheet.

Fifth, you can save the screenshot image. So that it can be used according to individual needs. How to save it: Click File >> Save as >> Select the desired file format (usually JPG) >> Name the file >> Save.

How to take a screenshot on Laptop Windows 7, 8, 10
At this point, I will explain how to take screenshots on a laptop with a Windows operating system. I include the operating system because there are applications that are already installed on windows by default. So for other OS users, this method may not necessarily be applicable to your laptop. Unlike the first point earlier. For any OS, I think you can use it so that you can apply it.
First, look for an application called ‘Snipping Tool,’ just type in the search field.

Second, the left click to open the application. There a rectangular Snipping Tool window will appear.

If I zoom in, a window like this will appear on our laptop. You can notice the menu bar of the Snipping Tool. There are menus: New, Mode, Delay, Cancel, and Options. What are the functions of the menu? Here I explain briefly.
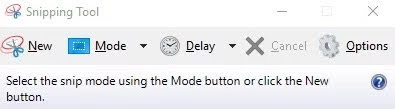
- New: the menu used to start a screenshot on a laptop. So, when we click New, an area of the screen that is ready to be captured will automatically appear.
- Mode: This menu consists of the Free-form Snip, Rectangular Snip, Window Snip, and Full-screen snip.
- Delay: menu to set the delay time between 1 to 5 seconds.
- Cancel: the menu used to cancel when we have clicked New or during the screen capture process.
- Options: menu to adjust the configuration of the Snipping Tool itself.
Third, when we use the Snipping Tool to capture the laptop screen area. We need to adjust the mode of the Snipping Tool according to our needs. I already mentioned it in the second step. There are several modes, including:
- Free-form snip: mode for capturing the laptop screen in free-form. So the Snipping Tool provides a scissor-shaped cursor that is used to cut the area of the screen that you want to capture.
- Rectangular snip: mode for capturing laptop screens with a rectangular shape. Automatically the screenshot will be rectangular.
- Window snip: a screen capture mode with the shape of the application window. This mode is useful; for example, on a laptop screen, there are many open applications. Then, the Snipping Tool can choose which application window you want to capture (screenshot).
- Full-screen snip: full-screen capture mode of the laptop screen.
Screenshot of all four modes.

Fourth, after you choose the mode as needed. We are on to the next step. Emm, for example, I have chosen a rectangular mode. Make sure that the mode is selected.

Fifth, we click New to start the screenshot on your laptop. Then our laptop screen will freeze, and the cursor will be in the form of plus (+).
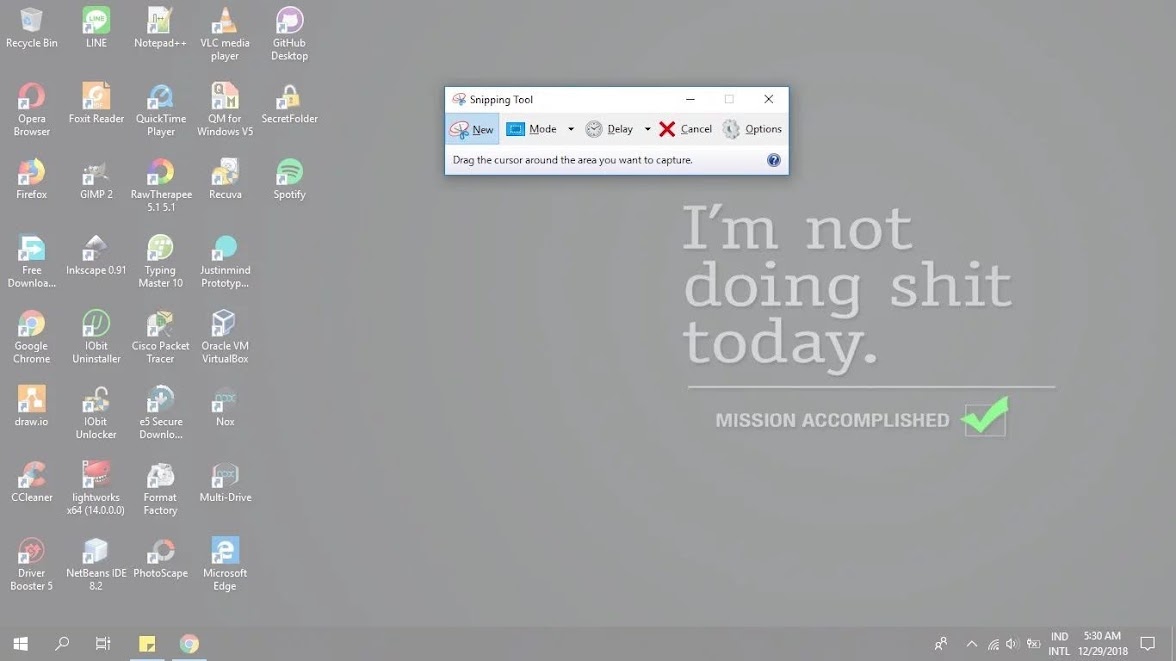
Sixth, because we chose the rectangular mode earlier. Then we need to form the rectangle with the cursor. You do this by holding down the left click. Then release the left click when a rectangle is formed. It can be seen in the GIF below.
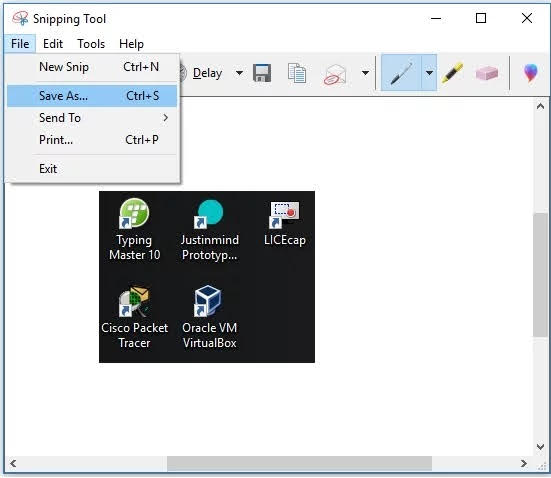
Seventh, right after the left click is released. The Snipping Tool window will appear containing the screenshot that was earlier. Please save the image so that it can be used according to individual needs. How: Click File >> Save As >> Select the format as needed (usually JPG) >> Name the file >> Save.
Another Fashion GIF Tutorial
The method is similar to the rectangular mode, only different when capturing the screen. Please pay attention to the GIFs of each mode below.
Free-form mode
Full-screen mode
Of the four modes above, which one are you more comfortable using? I personally often use rectangular mode and window mode for screenshots. Yep, please adjust it to your needs. Good luck.
Anyway, how to screenshot using the Snipping Tool can be applied to laptops of any brand (Asus, Acer, Toshiba, and others). The only requirement is to install the Snipping Tool on the laptop. Luckily for Windows OS users, the Snipping Tool has been installed automatically since Windows was first installed.
How to screenshot of a website
So that this article is more complete, so I will add a way to screenshot on the website. Maybe for some people, this method can be used as a substitute for bookmarks on the website. So, the website can be read in the form of the screenshot that was earlier. You can do this by using the Snipping Tool or pressing the Print Screen button; however, as we know that there are several websites that are stretched. So if you use the method above, the website cannot be a screenshot in full.
Then you need extensions in your browser. Extensions are applications that are installed on the browser. If you are using Chrome, you can access it via URL: chrome: // extensions / to see extensions installed on Chrome. However, if you are a Mozilla user, you can access it via the URL: about: addons to view the extension. Well, what extensions are required? Here’s the extension.
Chrome

Make sure the above extensions have been installed on your respective Chrome browsers. So that the S logo will appear in the upper right corner of your browser.
First, visit the website that you want to screenshot first. For example, I visited the website www.droidcops.com and wanted a screenshot of the web.
Second, click the S logo in the upper right corner of your browser so that many choices will appear.
Third, click ‘Capture entire page’ to start a screenshot of the website page.
Fourth, a page will appear to adjust the storage of the screenshot results.
Fifth, you can arrange it according to your wishes. The results of this screenshot we can save it as an image (PNG / JPG) and a PDF.

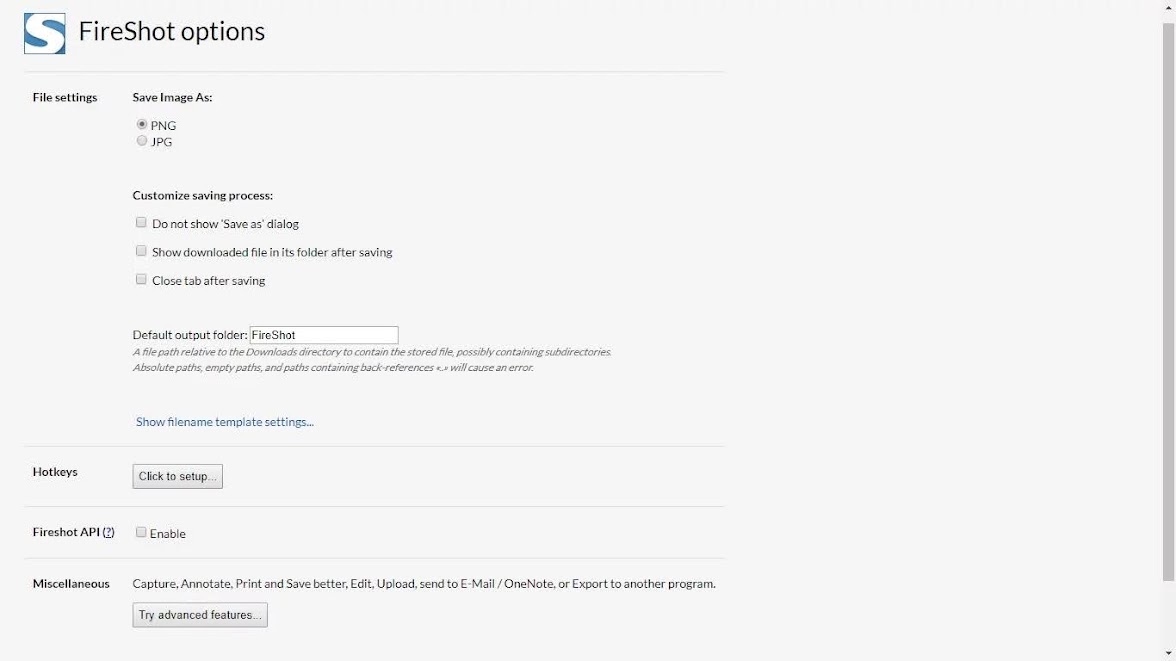
For those of you who want further custom. Just click customize it, and it will be redirected to the FireShot options page. There you can arrange it in such a way.
Sixth, the results of the web screenshot will be as below. Full extends from header to footer so that we don’t have to bother taking part screenshots and producing lots of image files.
Mozilla

If you are a Mozilla user, make sure the extension above has been installed. Marked by the logo icon appears in the top right corner of Mozilla.

First, visit the website that you want to screenshot.
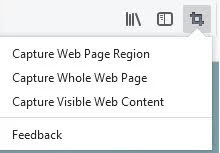
Second, click the Easy Screenshot logo icon, and many options will appear as below.
Third, click Capture Whole Web Page to start the full web screenshot.
Fourth, the website has been successfully screenshot. Next, we save the screenshot result. The method is by clicking the diskette icon (save) in the top row. Then, choose the file format you need.
Conclusion
Finally, the article about how to screenshot on a laptop has reached its end. I hope it was useful for you.
Thank you for Reading!