

How to Install Anaconda Python on Ubuntu VPS
There are many data science platforms that you can use, one of which is Anaconda. This platform is quite popular among data scientists because it is open source and free. Anaconda also has various tools for data science and machine learning that can be installed in one installation.
Besides, Anaconda is a data science platform that is easy to learn, especially for beginners. Well, if you want to install Anaconda, we will explain the guidelines in this article. In this guide, we will install Anaconda on Ubuntu.
How to Install Anaconda on Ubuntu
In this guide, we will install Anaconda version 2019.10. Maybe when you read this guide, Anaconda has released a new version. You can check the latest version of Anaconda here. Even so, the installation procedure remains the same.
Step 1-Login VPS
VPS login is used for server login; you can get Login details in the panel or email when you buy VPS.
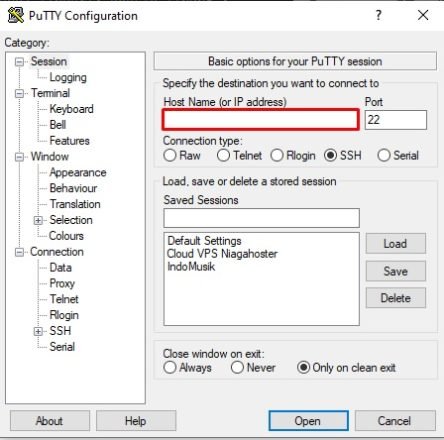
If you use Windows, you will need applications like PuTTY. Enter the IP in the Host Name (or IP address) box then click Open.
Then a page will appear to enter the user login as then enter the password that was provided via email when purchasing VPS.

As for Linux and Mac, you can use the terminal which has become the default application on the operating system. Enter the command below to login to the server.
$ ssh root@server_IP_Anda
After the login process is complete, you will receive a warning about the authenticity of the host.
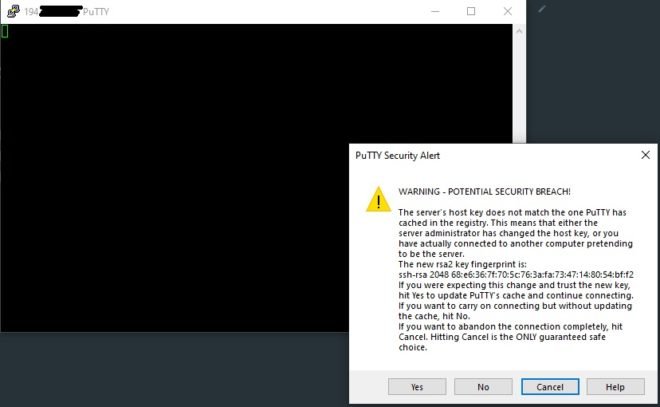
After clicking YES then you will be asked to enter your user login as and password.

If this is your first time logging in to the server with a password, you can check the password in the email you used for VPS purchases. In the email, you will get complete information to log in to SSH.
Step 2-Enter the tmp directory
Before installing Anaconda, you must enter the tmp directory using the following command:
# cd /tmp

Step 3 – Download Anaconda
Next is the process to download Anaconda. Make sure you have a stable internet connection in the download process because a bad internet connection will interfere with the download process and can cause the file error.
Enter the following command to start the Anaconda download process:
# curl -O https://repo.anaconda.com/archive/Anaconda3-2019.10-Linux-x86_64.sh

The picture above explains that the file downloaded has a total size of 505Mb. Wait until the download is complete.
Step 4-Verify Data Integrity
After the download process is complete, you must verify the data integrity of the package. To do this, enter the following command:
# sha256sum Anaconda3-2019.10-Linux-x86_64.sh

Also Check: 4 Easy Steps to Install ionCube Loader on Ubuntu
Step 5 – Run the Anaconda Script
Next, run the following script to review the license agreement by pressing ENTER.
# bash Anaconda3-2019.03-Linux-x86_64.sh
The output from the above command is as follows.
Output
Welcome to Anaconda3 2019.10
To continue the installation process, please review the license
agreement.
Please, press ENTER to continue
>>>
…
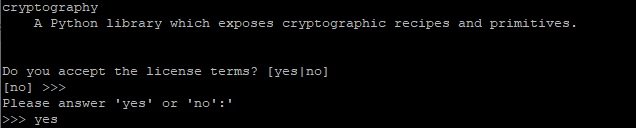
Do you approve the license terms? [yes|no]
After understanding the Anaconda license, you only need to type YES and press ENTER to continue.
Step 6 – Complete the Installation Process
After agreeing to the license, you will be asked to choose the location of the Anaconda installation. You can directly press ENTER to install Anaconda in the default location. If you want to change the installation location, you can immediately write it down then press ENTER.
To simplify the installation process, you should select the default location so that no errors occur when running the Anaconda application.

Step 7 – Installation Complete
After the Anaconda installation is complete, you need to add the location of the installed Anaconda Python to the Ubuntu Path. Type YES and press the ENTER button.

Step 8 – Activate Installation
You can activate the Anaconda installation using the following command:
# source ~/.bashrc
Step 9 – Check Anaconda Python Info
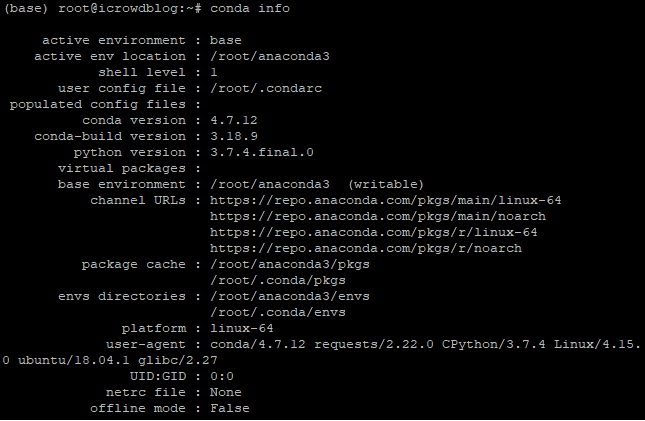
After activating the Anaconda installation, you need to check it first. You can check the Anaconda installation location info and Anaconda application version using the following command.
# conda info
Step 10- Update Anaconda
To update the Anaconda version, you only need to enter the following command.
# conda anaconda update
When the update process is running, you will be asked to confirm the update process by pressing the y button then ENTER to continue.
Conclusion
Done, you have successfully installed Anaconda on Ubuntu. If you are still not familiar with the Python programming language, don’t worry. You can learn it in basic articles in the Python programming language.
That is the tutorial for how to install Anaconda on Ubuntu. If you still have questions, do not hesitate to leave in the comments column. Don’t forget to follow us to get VPS and WordPress information from us.
Also Check: How To Install Drupal on Hosting, Local Host (Xampp)